Blog
Germinating Cannabis Seeds
Germinating Cannabis Seeds – The Ultimate Guide
Germinating cannabis seeds can be difficult. If it is for you, I suggest you give this my favorite method of germination a try. I feel that if you want to give your seeds their very best chance to germinate…(they really do want to!) you should also adopt this germination method.
You can also read about germinating cannabis seeds using this technique here…Cannabis Seed Germination Test 2024
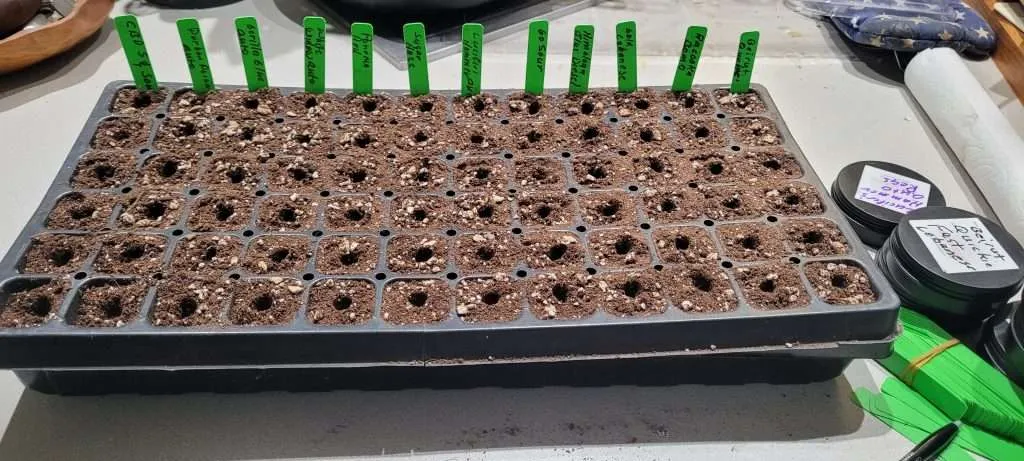
I like to use one of those germination trays, with a humidity dome, that you can find at your local grow shop, and of course online. Amazon carries them I am sure…
I also use a premium potting soil, do not make the mistake of using the cheapest one at the local box store! Remember you have paid good money for those seeds….give yourself the best chance of success.
I fill each hole with the soil, packing it in just a bit…this will make it easier to remove the seedling when it is time…..the perlite will keep it airy.
Then make a hole in the soil in each place you will place a seed. Generally a seed should be planted 2 or 3 times it’s width. For cannabis seeds 1/4 to 1/2 inch should be fine, error on the side of not too deep, as moisture will not be a problem when germinating cannabis seeds using this technique.
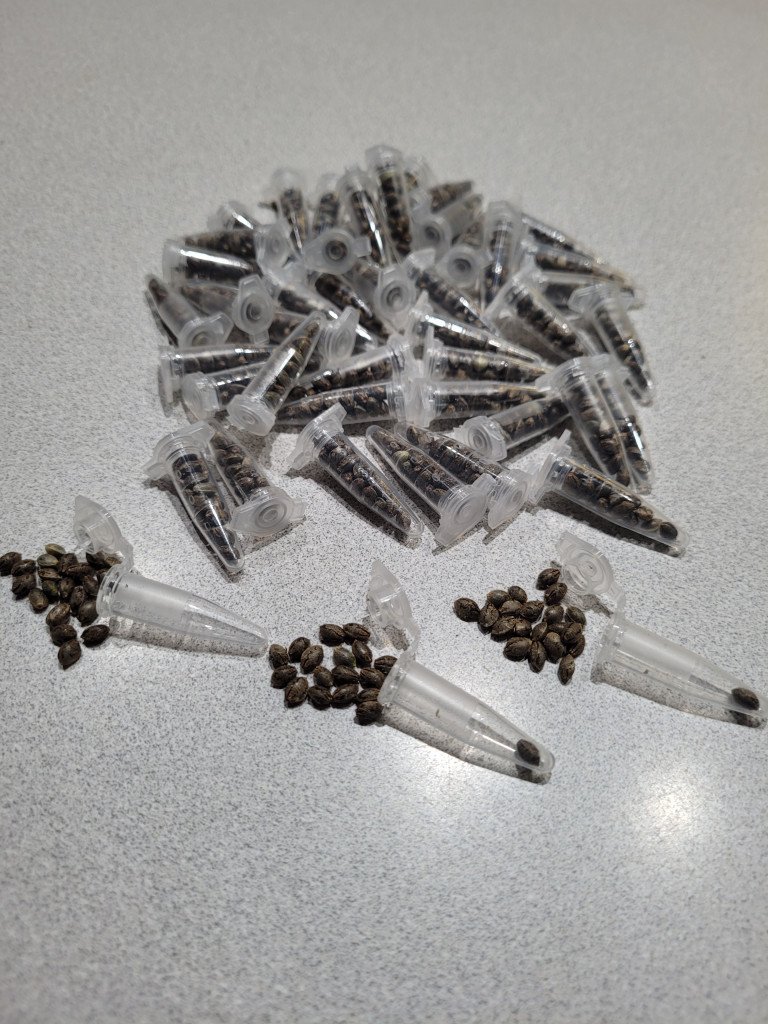
I usually use a sharpened pencil to make my holes. I then make all my holes that I need to plant the number of seeds I will be sprouting. Then simply drop a seed in each hole, making sure the seeds are at the desired depth…mark what strains you are planting if you wish.
Now it is time to wet the seeds so they will soak up the water and the germination process can begin when germinating cannabis seeds. Here again, I think it is best error on the side of using the best water you can get your hands on, and in my opinion that is store bought distilled water. The pH is neutral, and this water will be free of any kind of contaminates that could affect germination.
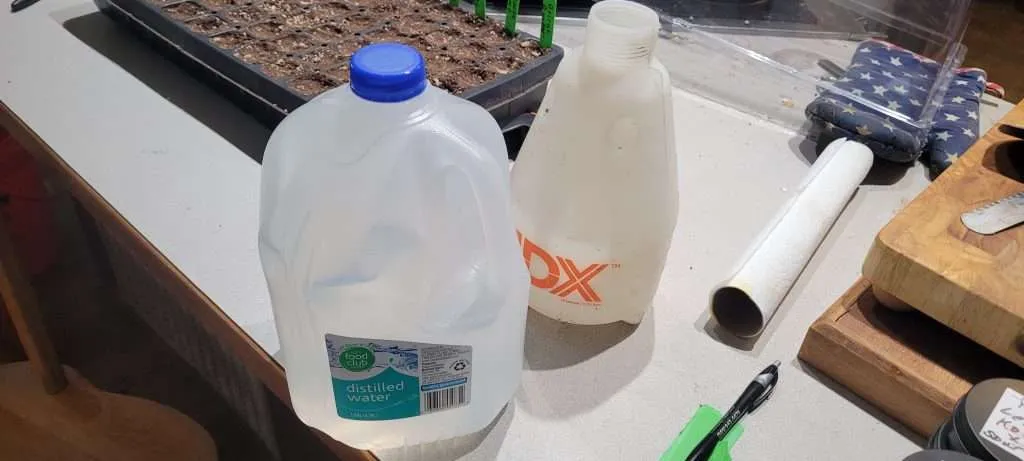
I also make use of a spray bottle for applying the water. I buy mine at Home Depot, but any kind of clean spray bottle will work.
Now wet the top of the soil where the seeds are planted. Do not soak, rather wet the soil till you know the seeds are wet, without completely soaking them, there should be no runoff. You want the water contained in the soil around the seeds without coming out of the bottom of the planting cubicles. Too much water is not a good thing.
Now you are ready for the humidity dome…..and bottom heat mats….especially important if you are sprouting when it may be cool.
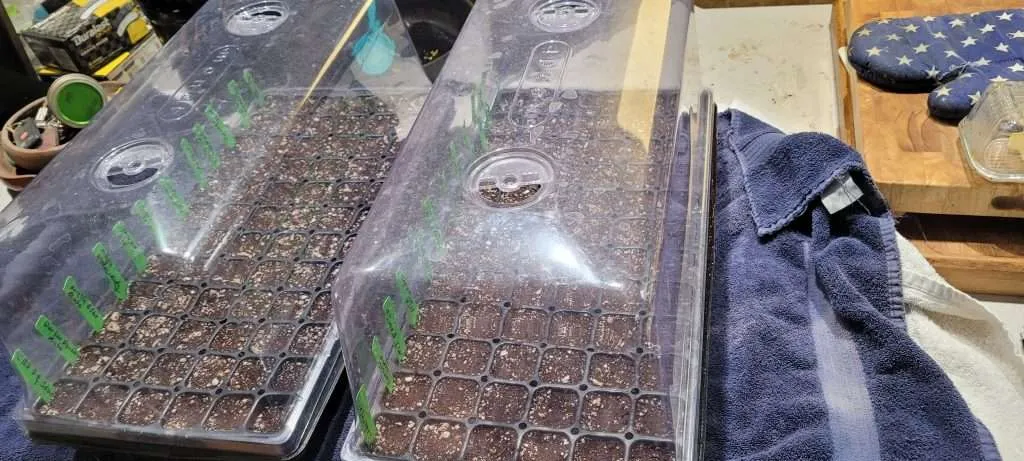
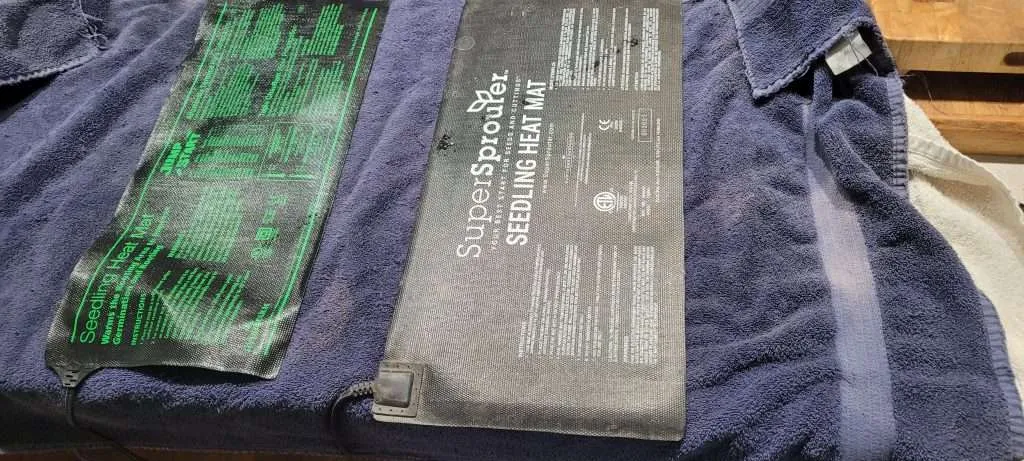
I like to leave a slide open on the humidity dome so some exchange of air can take place. I place the tray directly on the heat mat and plug them in. If you are germinating cannabis seeds when the ambient temperature will be around 80 degrees Fahrenheit, you could likely forgo the heat mats.
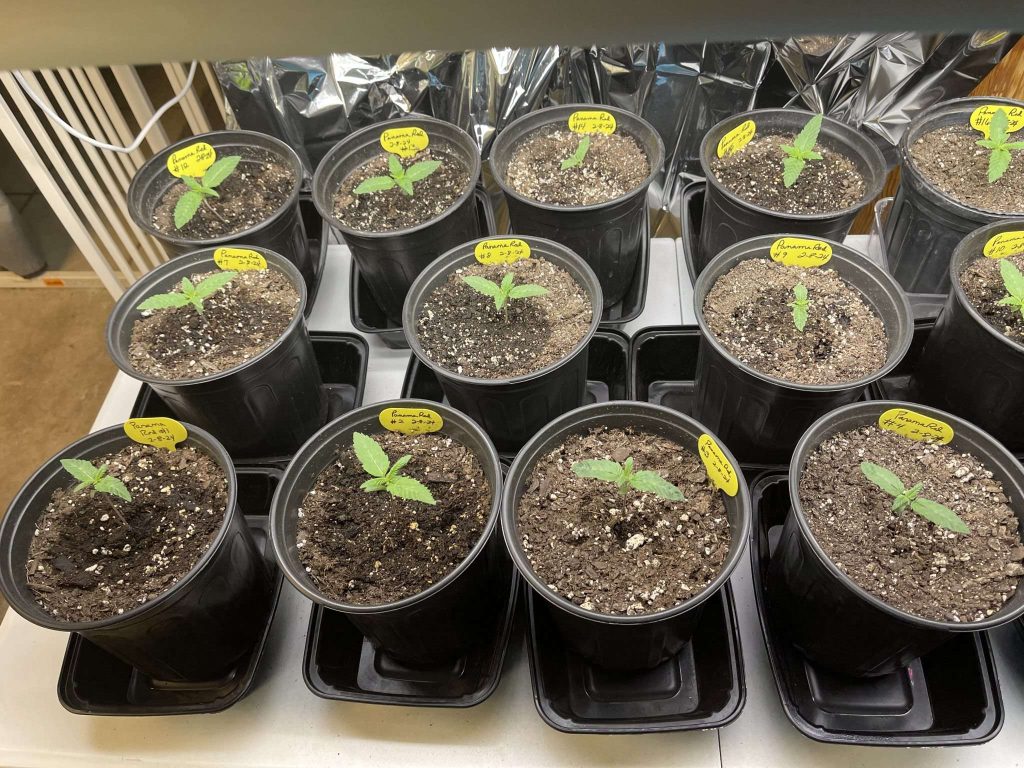
Congratulations you have planted your seeds with what I believe the best possible chance of success. I test germinated 24 of my strains and got 99% germination….only 3 no shows out of 300.
But, we are not done yet…
I like to lightly water the seeds everyday with the spray bottle of distilled water, again without soaking them. I leave the humidity domes on till I see they have all germinated or a week or so has gone by, although old seeds, or seeds that are slow to germinate could take a bit longer (not my seeds, they seem to jump out of the ground usually in just a few days)
A few other things to keep in mind, cannabis seeds need no light at all to germinate, and putting them in the hot sun is could result in failure. I like to germinate cannabis seeds inside my house where it is about 70 degrees. not worrying about giving them light till they germinate. Once they do germinate they will need light, and at this stage I think an indoor light is best…even just a cheap florescent light, or an LED. You do not want to over heat them by placing them in the hot sun.
Once they have germinated, and are beginning to get their first set of real leaves it is time to transplant. Now it is time to soak them, so the soil and roots stay together. I usually use a fork to be the least invasive, carefully scoop them out taking all the soil with the roots, then quickly plant them in their forever homes up to about 1/4 inch to their leaves. And water them on….
There, now you are done, and hopefully your plants will do you proud!
The rest of this article was written for me, and will cover many of the other germination techniques commonly used. Read on if you would like to utilize one of these other germination methods….
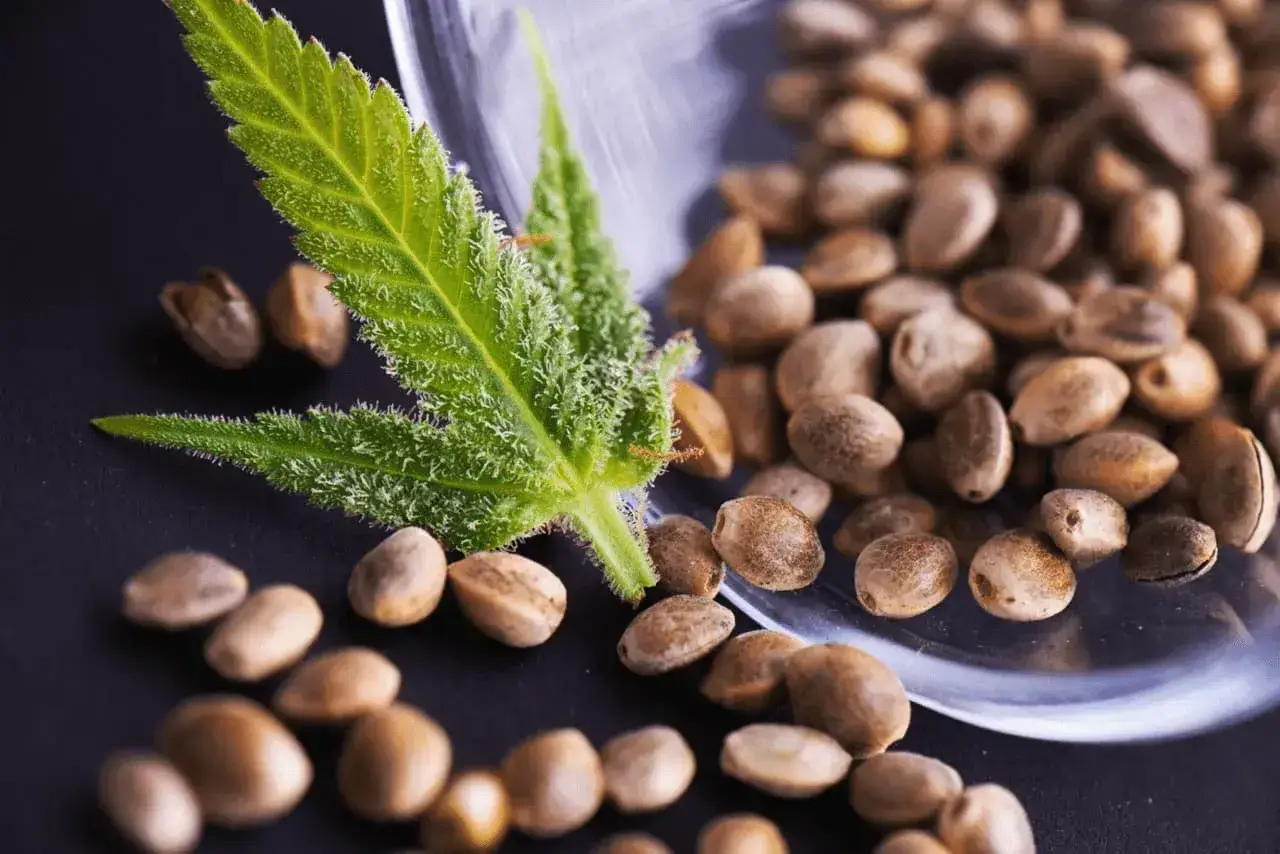
Lets start this off with the very basics….What is a Cannabis Seed?
Cannabis cultivation is truly fun and a worthwhile learning experience. From having a tiny seed to witnessing the growth of your very own cannabis plant, it’s an exciting journey indeed. Understanding germination is part of the process, a crucial first step allowing for a higher success rate with each attempt. Germinating cannabis seeds is magical, as it sets the stage for a rewarding cannabis cultivation journey. However, the process is usually not as simple as it seems. Some are successful, and some are not. Questions arise at this point, such as whether you have the right seed and if you planted in the right conditions.
In this guide, we discuss everything you need to know about germinating cannabis seeds. Learn the process, the materials required, the steps, and more by reading below.
What is Cannabis Seed Germination?

Germination kickstarts the life cycle of any plant. In this case, we’re talking about cannabis, in which germinating seeds involves persuading the slumbering seeds. The process prompts the seeds to sprout and turn into more robust seedlings.
If your germination procedure is successful, you can rest easy that the cannabis plants will be healthy and full of vitality. That’s why it is significant to ensure that you have this phase down pat, as it has a direct effect on the quantity and quality of your plants.
Like other plants, germinating cannabis seeds requires good environmental conditions, including warmth, light, and moisture. Seasoned growers may argue about certain tactics, but the trick lies mostly in the seeds you use. Pro tip: Always use high-quality cannabis seeds (I got you covered!) – the best seeds you can afford. After all, germination is about getting a seed to sprout a taproot. This root will later serve as the plant’s main root, planting itself into the soil as it matures.
As much as possible, choose feminized seeds. This is due to the proven fact that female pot plants have the ability to produce impressive buds that cannabis growers crave and love. Therefore, if you are an absolute beginner or not that experienced, start with feminized seeds (or if money is tight pick up one my proven Free Cannabis Seed Orders. That way, you get more buds as the plants grow. Remember, however, feminized plants do not guarantee 100% female plants, though they can give you a much higher chance than a standard seed selection.
Understanding Cannabis Seeds
Cannabis seeds are small and fragile, requiring your helping hand every step of the way. There are a number of ways to germinate cannabis seeds, all with their own advantages and disadvantages. They also have varying degrees of success.
However, no matter which you select, you must remember there is still a considerable chance that you will end up with a few dud seeds – even with a germination way and technique that works for you. Such bad results are natural when working with a plant, a living organism ( I guarantee 80% germination). And this is why it is so vital that you select your seeds carefully. Go for high-quality seeds whenever you can, and heed these tips for more success:
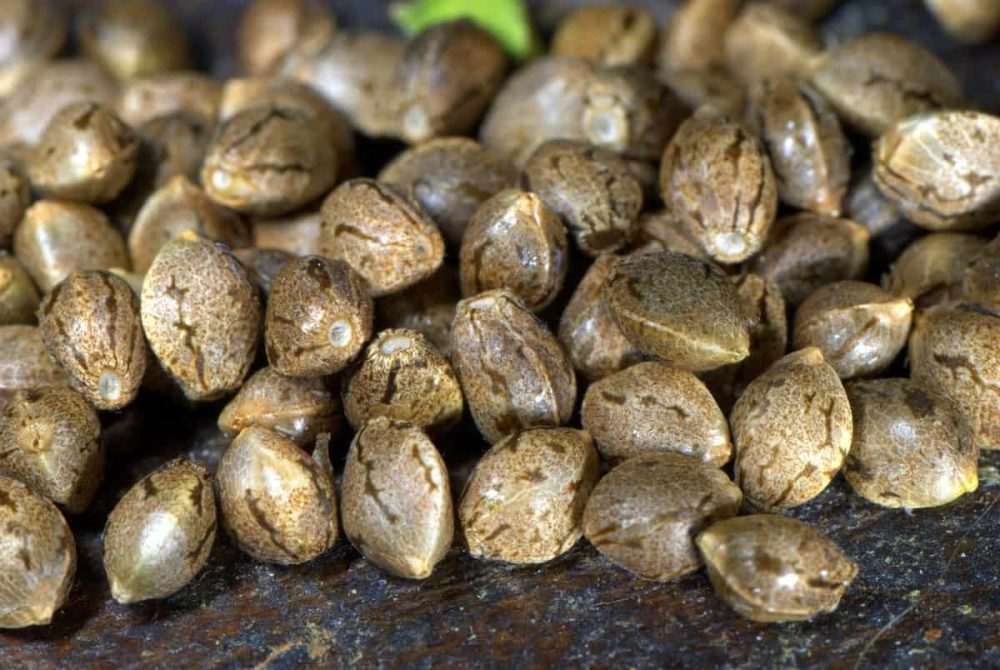
- Always give the seeds a slight inspection before you plant them. Do so as delicately as possible. While it is true that most seeds will germinate, creating a poor germination environment can result in a weaker plant.
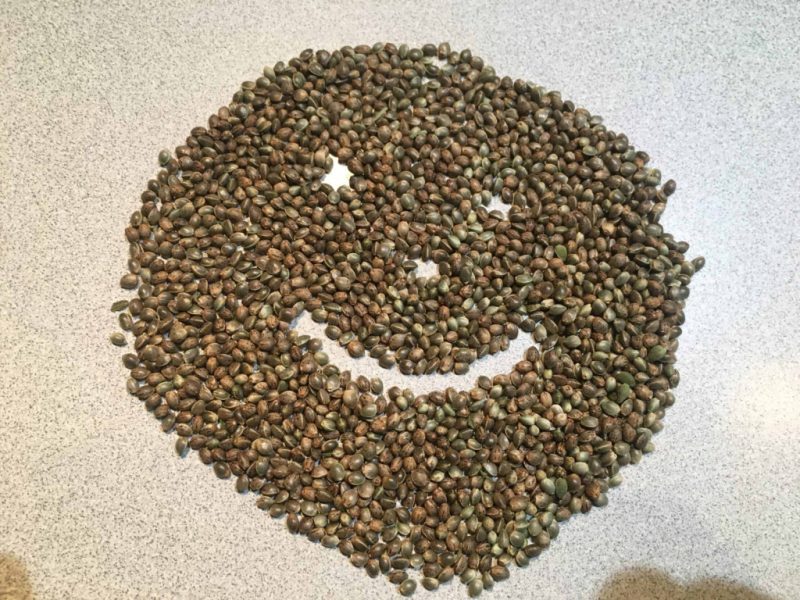
- Pick seeds that are darker in color. Generally, they have a better chance of germinating successfully.
- Seasoned growers often avoid pale green and white seeds. That’s because these seeds have a higher likelihood of failing.
- If you have dark seeds that look slightly damaged, you may still want to plant them over the paler seeds. This is true even if you see crushed outer shells. Chances are the seed will still germinate.
Are you working with Cannabis Sativa, Indica, or Ruderalis? The good news is that it does not matter. Regardless of the strain, germination is crucial as it lays the foundation for the plant’s growth cycle. The process can take anywhere from a few days to a week.
Essential Tools and Materials for Germinating Cannabis Seeds
Just like with any plant, having the right tools and equipment is necessary for a successful weed harvest. Here is a list of the things you will need:
- Grow Tent: This is a must for any cannabis grower. A grow tent provides shelter for the plants, allowing them to thrive without having to worry about pests (hopefully). This area should give adequate humidity, airflow, and temperature regulation to prevent powdery mildew. Having a grow tent is also great if you plan to cultivate clones. Some growers will advise you to have a portable grow tent, especially if you plan to move the plant to a new location later. Portability is also advantageous as the tent can serve as a drying room.
- Pots: If you observe experienced cultivators, you will see that they prefer large grow pots. That’s because these pots offer adequate space for roots to grow into the soil. Stress training on the branches is undoubtedly challenging if the plant does not have a steady and sturdy anchor in the first place. Let’s also not forget the fact that the roots are the part of the plant that absorbs soil nutrients. If you’re looking into the type of pot to use, you may want to consider fabric grow pots instead of plastic buckets or clay pots. They have a more porous texture for easy drainage of excess water and do not accumulate at high temperatures.
- Lights: Grow lights are needed to germinate cannabis seeds, helping them transition to the vegetative state until they produce flowers. Therefore, you require a reliable light source, which can be in the form of LED panels or high-pressure sodium bulbs. Whichever you select, you should provide at least 18 hours of consistent light. At the same time, there should be a moderate amount of heat, which can help reduce the risk of dehydration of the crops.
- Fans: As the grow lights emit heat, you need fans to maintain a favorable temperature inside the tent. They not only help redirect excess heat and smell but also sustain adequate airflow, which is crucial in keeping the plants thriving.
- Humidifier and Dehumidifier: Maintaining the appropriate humidity levels for the plant to thrive is significant. The optimal range is between 40% to 50%. You may need to increase the amount if you work with clones, keeping it from 60% to 65%. You must use a dehumidifier if the humidity levels are too high. Meanwhile, a humidifier is useful to sustain ideal conditions to support plant photosynthesis and transpiration.
- Hygrometer: Speaking of humidity levels, you can measure the grow tent’s humidity with a hygrometer. Knowing the exact number will help ensure the crops will not be affected by unfavorable humidity conditions.
- Thermometer: Similar to the hygrometer, it also helps to know the temperature in your grow tent. That way, you can be sure that the plants are not exposed to high heat, which can lead to stress and poor metabolism.
- pH Meter: It is recommended that you test the soil pH first before planting the seeds. pH is the unit of measurement that tells you the alkalinity or acidity of the soil. Cannabis prefers a slightly acidic range from 6.0 to 6.5 so that it germinates successfully.
- Nutrients: The soil where you plant the seeds should be nitrogen-rich. This nutrient helps promote the development of chlorophyll in leaves. Nitrogen is also the key to the plant’s strong stems and branches. Another nutrient you should not ignore is potassium, which allows the plant to adapt to heat and ultraviolet rays under the sun or other light sources.
- Pipettes: To give your marijuana the nutrients it requires, use a clean pipette to provide it with phosphorus and potassium. These nutrients are available in water-soluble liquid fertilizer forms, so you can use a pipette to deliver them to your plants.
Apart from those listed above, you will also need denatured alcohol to sanitize the grow tent. You will need to clean the tent at least once a week with alcohol to stop parasites from invading the plants. Some growers also recommend the use of a pocket microscope, especially if you are interested in determining the sex of the plant. This tool makes it easier for you to spot male pollen sacs. It’s also valuable for finding powdery mildew or mites when you water or defoliate them.
Other tools you may need are trimming scissors for making small and accurate cuts, an eye shield to protect your eyes from the blinding bright lights inside the tent, and sticky traps to control pests. You may also want to have a spray bottle or pump ready for foliar feeding and a drying rack when it’s time to harvest weed.
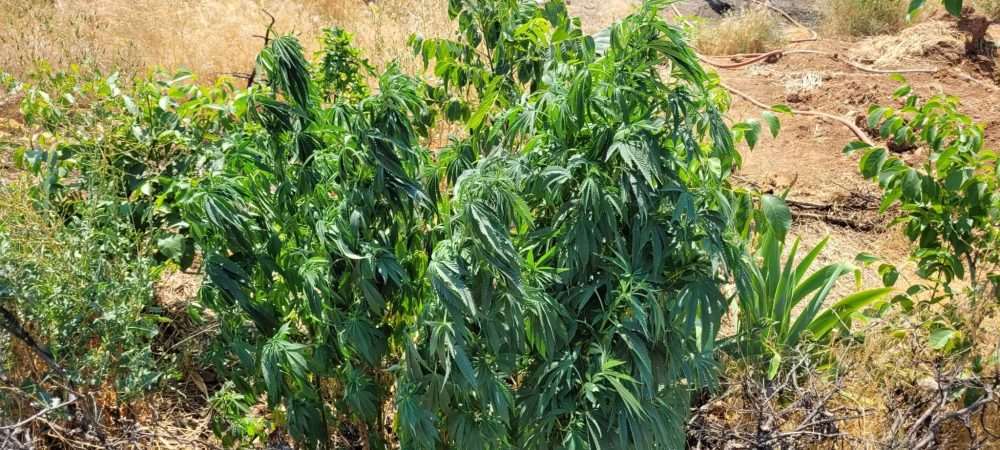
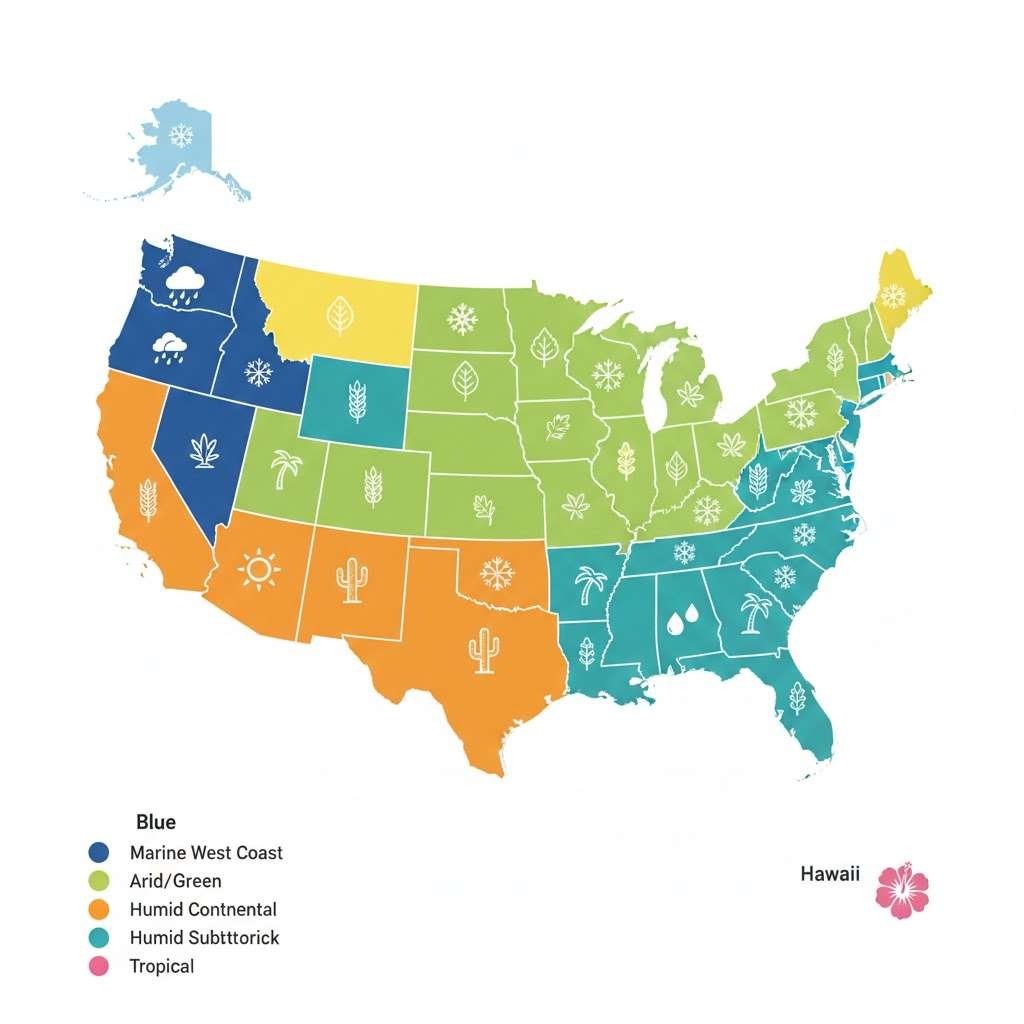
What to Do Before You Start Germinating Weed Seeds
It is exciting to begin planting the seeds, but there are a few precautions you need to take before you officially start. Cannabis cultivation is generally successful if you pick healthy, quality seeds. These seeds should also be suitable for your environment and climate, which is especially important if you plan to grow outdoors. To make your decision easier, you must take the time to read the product page of the marijuana seeds you intend to buy. That way, you get all the significant details, including pest resistance, climate suitability, mold vulnerability, and more.
On the other hand, if you have a climate-controlled site or plan to grow indoors, you will usually not have any problem regardless of the plant you choose. Any marijuana plant can thrive if you provide it with the proper setup.
You may also look into the strain, as certain strains have specific growth patterns, flavors, and THC or CBD content. More importantly, you should have a germination space that’s clean and organized. It should be well-ventilated and can sustain a stable temperature. To save time, you should already have the essential tools listed above, along with other materials needed depending on the germination method you select.
Keep the seeds in a sealed plastic bag and store them in the fridge if you do not intend to germinate the cannabis seeds yet. Only take them out when ready, mimicking the change from winter to spring. It’s usually the time when cannabis plants sprout and germinate. If you’re wondering when to germinate seeds outdoors, expert growers say it should be done in spring. Choose a warmer period or when it begins to encourage germination. Planting too early in the year when the weather is still too cold could lead to the death of the plant.
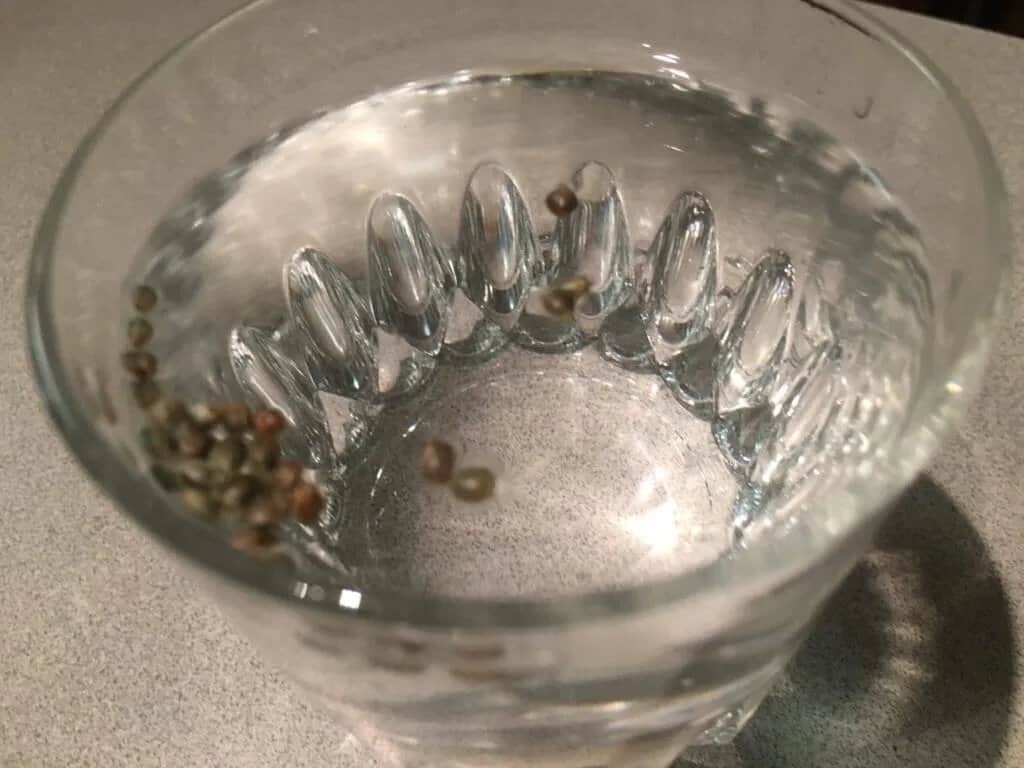
Although not required, some growers say it helps if you soak the seeds for 12 hours in a glass of distilled water. Doing so will soften the seed coat, allowing the germination process to begin quickly. Don’t take longer, or it will deprive the seeds of oxygen, preventing sprouting. Keep the glass at room temperature, and be sure to put a label to avoid accidents, such as someone drinking the water by mistake.
If the seeds sink after 12 hours, it is often a good sign of viability. Those seeds are suitable for germination, unlike those that float, especially after soaking them for 12 hours.
Be sure to check the growing medium’s pH level, as cannabis prefers an acidic pH between 6.0 and 6.5.
Expect pot seeds to sprout anywhere from four to 10 days, although the time frame may differ depending on the germination technique. It is often helpful to start with your seeds indoors, which makes temperature and humidity regulation much more manageable.
Cannabis Seed Germination Techniques and Steps
There are numerous ways to germinate cannabis seeds. However, five basic methods have gained popularity over the last several years. These germination techniques come with their own advantages and disadvantages, but all of them require adequate warmth, air, and moisture to be successful. In general, most cannabis seeds thrive at 70 to 90 degrees Fahrenheit, the ideal range for sprouting seedlings.
Here are your five options for germination techniques:
- The Glass of Water Method
Most experienced cannabis growers agree that the glass-of-water approach is the least effective of all the methods in this list. However, it does not mean it isn’t viable. Because it is easy to follow, many beginners choose this approach to germinate their cannabis seeds. You only need a half-full glass or bowl of water, which should have a temperature of 71 degrees Fahrenheit (22 degrees Celsius).
Once the seeds are in the water, allow them to soak for three to five days. You will later see that the seeds are beginning to open with tiny white tips appearing. These are the roots of your plant. Wait for them to reach about 0.4 to 0.8 inches (1 to 2 cm) long before transferring them to soil pots. These pots should have small holes, as small as 0.39 to 0.59 inches (10 to 15 mm).
Once secure, place a fluorescent light or any appropriate light source about 5 to 6 inches away from the pots. Doing so will help speed up the growth. You will also have to avoid over-watering the seeds. Instead, it is recommended that you use a spray, particularly at this very early stage, to ensure the seeds remain damp without soaking them.
- Wet Towel Method

Many growers like this approach as it is easy and comes in several iterations. The most common are cotton wool pads, kitchen towels (white, no ink), and absorbent pieces of paper. As an example, we will use kitchen towels as they are relatively useful for holding moisture. You can place the seeds on a damp kitchen towel, making sure to give them a bit of space away from one another. Then, place another damp kitchen towel on top. Note that the kitchen towels must be damp and not wet.
Just like in the previous method, when you see that the white root tips reach 0.4 to 0.8 inches (1 to 2 cm), you can move them carefully to a soil pot.
- Soil Method
Another popular option, which saves a lot of time and work, is simply planting the seeds directly into your preferred growing medium. Germinating your cannabis seeds using this technique is considered safe as it avoids damaging the microscopic filaments in the first root tip (very important.) Additionally, planting in soil provides a more consistent temperature, unlike the other two methods mentioned previously.

For this approach, you will require premium-quality soil soaked in water. It also helps to add a root simulator to the water. Make a hole about 0.39 to 0.59 inches (10 to 15 mm) deep, where you will bury the seeds before loosely covering them with soil. Ensure, however, that the soil is not too compressed above the seed; otherwise, the root will have a hard time penetrating the compacted soil. If you do this, plant growth will be slower, and there could be even more problems later on. Also, don’t forget to keep the top of the soil moist by spraying it with water.
Some growers are not comfortable with pre-soaking the soil. As an alternative, you can spray the little holes you dug before placing the seeds. Enough moisture around the seeds will encourage the root to develop faster. Soaking the soil can be detrimental when attempting to germinate cannabis seeds.
For this method, you will need to wait anywhere from four to 10 days to see a seedling sprout. Underneath, though, the roots have already begun to spread. After that period, you can transfer the plant and soil to a larger pot so that you can start the regular growing routine. Or as I tend to do is simply plant them in their forever home right from the start.
- Stone Wool Blocks Approach
Two of the trickiest issues with germination of cannabis seeds are temperature and moisture. It is often difficult to maintain the ideal temperature, which is between 71F and 77F (22C to 25C). Some inexperienced growers choose to leave seeds on a windowsill or in an open environment, which is a huge mistake. You would do much better if you had a climate-controlled cupboard that you set up on your own. You can also use a warming mat, which is helpful in keeping temperature at consistent levels.
You can solve the problems stated above by investing in specific equipment, or you can simply use stone wool blocks. These blocks should first be soaked in water, just like you would with soil. The great thing about them is that they retain moisture for a long time, meaning you don’t need to water during early germination stages. Once soaked, stick the wool blocks in a lidded plastic tray, such as large cake tubs.
Thanks to the plastic container’s dome, you give your seeds your own version of tropical climate. You can place the tray and its components in a cupboard with a fan, lights, and correct temperature. The result of this DIY is an endless supply of moisture. You will not even need to touch the seeds again. All you have to do now is to wait until the young seedlings are ready to be transferred to the growing medium.
This method is quite popular for many reasons, including that germination is quick – usually in one to two days. How do you know when it is time to transfer the seedlings? Check the root system, which should begin to poke out of the wool blocks as they grow downwards, seeking water and nutrients. Typically, you will need to wait two to three weeks after germination to move the seedlings to their new home. Here, you have two options. The first is to transplant them into soil pots. The second is to go for hydroponics.
- Jiffy Pot Planting
Also known as peat pellets or peat pods, you can buy Jiffy pots from nurseries. They are made from compressed peat moss, usually in a dehydrated form. When you add water to them, they will expand. Therefore, the first step to this popular and convenient method is to hydrate the Jiffy pots. You will need to place them in a shallow container or a seed tray before adding warm water to the tray. The pots themselves will begin absorbing the liquid, which quickly becomes evident as they expand.
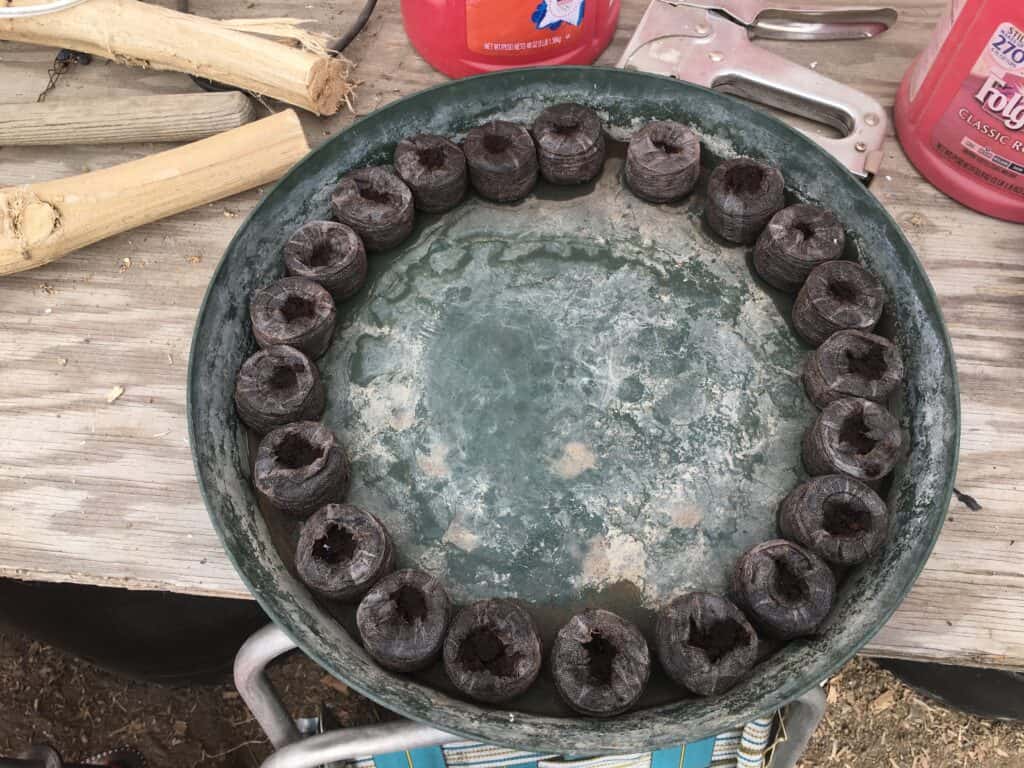
The next step is to plant the seeds in the pots, making a hole in the center of the pot about a quarter to half an inch deep. Put a seed in each hole, covering it with the expanded peat. You will need to water the Jiffy pots completely, but make sure they are not waterlogged. Have a spray bottle ready to mist the surface when you see that it is getting dry.
You will now need to create an ideal environment for your crop. Take care of the humidity by covering the tray with a plastic wrap or humidity dome so the plant has a humid environment. If you live in a cooler area or your growing site is on the colder side, it helps to place the tray on a heating mat. That way, you can sustain an optimal temperature for germinating cannabis seeds, which is around 70 to 85F (21 to 29C). Don’t forget the lighting, as well, by providing a gentle light source for the plant.
When you see that the seedlings have some leaves and are robust enough, you can move them to your preferred growing medium.
Top Mistakes to Avoid and How to Troubleshoot Issues
In most cases, germinating cannabis seeds will take place without any hitch. If you have been on trial and error for some time, there could be some mistakes that you may be making. The good news is that it is possible to achieve better results; however. You should not expect 100% germination, although there will always be room for improvement. That said, here are some possible mistakes you may have been making without you knowing:
- Correcting Lighting Issues
Make sure you have fluorescent or CFL or LED grow lights, the only type of lights your seeds and young seedlings need early in the germination stages. Indeed, plants require good lighting in order to thrive. However, young cannabis does not need too much light, as it can be damaging during the first few weeks.
You also have to keep the lights away from the seeds, about 5.9 inches (15cm) away. Once the first leaves with jagged edges begin to appear, you can move the lights about 2 inches (5cm) closer. You can check if the light is too close or damaging by placing your hand between the lights and the plant’s leaves. You can move the lights away if you cannot keep your hand in the same place for about 10 seconds due to high temperature. Continue checking until you can comfortably hold your hand in place.
Once the plant is strong enough to withstand powerful lights, usually after two weeks, you can switch to metal-halide lamps or high-pressure sodium grow lights, or utilize my favorites at this point…LED’s.
- Having Upturned Cannabis Seeds
You may notice that the seeds are upside down. If so, there is no reason to panic, as this is a frequent occurrence. Roots always grow downwards as they seek nutrients and water. Therefore, it is not necessary to reposition the seeds, particularly at this crucial time. Doing so will only harm the plant. In many cases, it is not the root growing at the top of the seed but rather the stem of the plant.
You are advised to wait a few days until you see cotyledons or the first leaves appear. Most of the time, the seeds will eventually sort themselves out, provided their needs are met properly. You can later transfer the seeds to a larger pot after two weeks or so.
- UN-Germinating Cannabis Seeds
Germinating cannabis seeds does not take long – usually within two to three days. Sure, some seeds take longer because of certain factors, such as the germination technique you used and the hardness of the seed, or age of the seed. In general, if you have harder seeds, or old seeds it may take up to a week to see them begin sprouting, thanks to the thicker coating or age.
So, you have waited patiently, but it looks like the seeds have failed to germinate even after two weeks. Don’t fret; there is likely a sensible cause for the issue. More often than not, the main culprit is a low-quality or old seed, which generally has lower success rates. Another problem is related to temperature, which you must ensure should be within the optimal range as provided in the previous sections. Another common culprit can be the seeds are simply too wet.
You also have to ensure that moisture is at ideal levels to promote plant growth and development. Never underwater or over-water the seeds, which will only inhibit germination. If you think you did all of the above, it may be due to incorrect depth. Give the seed about 0.5 inches so that it has enough room for germination.
- Dealing with Pathogen and Mold Problems
Mold and pathogens are common issues when growing cannabis. Unfortunately, these organisms pose a significant threat to the seeds and seedlings. The good news, however, is that they are easy to prevent and address. Be sure that you maintain cleanliness by sterilizing your tools and containers. The growing area should be clean and tidy, as well, to reduce contamination risks.
Another way to fight pathogens is to control humidity. High humidity leads to the growth and spread of mold to your plants. You can use a dehumidifier to lower humidity levels and ensure that the growth room enjoys proper ventilation. If there are plants with mold or disease, sometimes the best cure is to let them go. Remove the seedlings affected by pathogens and dispose of them so they do not spread the problem.
- Addressing Nutrient Deficiencies
One of the common causes of nutrient deficiencies is pH imbalances. If the pH balance is improper, it can result in unhealthy plants, or poor seedling growth. You will also have less yield. Avoid the problem by consistently monitoring the growing medium’s nutrient levels and PH. Use the appropriate measuring tools to check if the plant is in an ideal environment. You can then make adjustments to nutrient concentrations whenever necessary.
It’s also recommended that you test the soil’s pH levels. Keep pH at 6.0 to 7.0, which is the healthy range for cannabis plants. If you continue to have nutrient or pH issues with the growing medium, perhaps it is time to flush it with pH-balanced water. This simple activity allows you to remove nutrients the medium may be getting too much or any imbalances blocking the seeds’ germination.
Caring for the Germinated Cannabis Seedlings
The seeds have finally sprouted, which means you have more things to do, including:
- Learn to transplant seeds properly. Once the seeds have germinated, you will see small roots and leaves. These seeds are now known as seedlings. This phase of their life generally requires that they are transplanted to a much larger container. If you prefer, you can move them to a different growing medium to give them proper space for root development.
- Understand the plant’s nutrient requirements. Like other living organisms, cannabis needs essential nutrients in order for it to grow. Among the most important nutrients are nitrogen, potassium, and phosphorus, along with micro-nutrients. As you are still dealing with seedlings, however, you need to dilute the nutrient solution for them. They have lower nutrient concentration requirements than mature plants, so be wary. You can gradually increase the strength of the formulation as the plant grows. Feeding usually does not start until after the first two to three weeks.
- Start the light cycle as soon as the seed has sprouted. This means you must give the plant 16 hours of light and eight hours of dimness. However, if you are growing your plant outdoors, you can put the germinated seeds under the sun and leave them there.
- Remove the seed shell. This task requires a little bit of care, which is essential in saving the plant. The last thing you want is to damage the leaves while you are at it, so ensure the seeds have enough moisture. That way, the shell is softer and easier to remove from the seedling.
- Sit back and relax. There is little to do during the first few weeks of the seedling’s development. If you have already tweaked the nutrients and other requirements, such as humidity, temperature, and lighting, you can leave the plant alone for the most part.
Give the seedling the vegetative state treatment at the right time. Once the first few weeks have passed, you should be ready to get back to work with the plant. You will have to adhere to strict lighting routines and provide it with full-intensity light. The vegetative phase is right when the seeds have germinated and peek above ground. The seedling immediately springs up. Give it a few months, and the plant will enter the blooming phase. That means you need to get your sheers out and start cutting carefully. Then, the last week of the flowering phase begins before you can finally harvest your cannabis.
Maximizing Cannabis Growth
Congratulations! You now have germinated cannabis seeds, but what’s next? The seedlings have begun their seedling stage, which is a critical period for the plant’s development. One thing that you need to know is that the seedling roots should be well-aerated, meaning the environment they are in should have enough space so that they can expand and become more robust. At this phase, some growers use rock wool cubes or coco coir, which can help roots grow strong. The wool cubes can hold the right amount of water and air, creating a solid space for the plant to stay healthy.
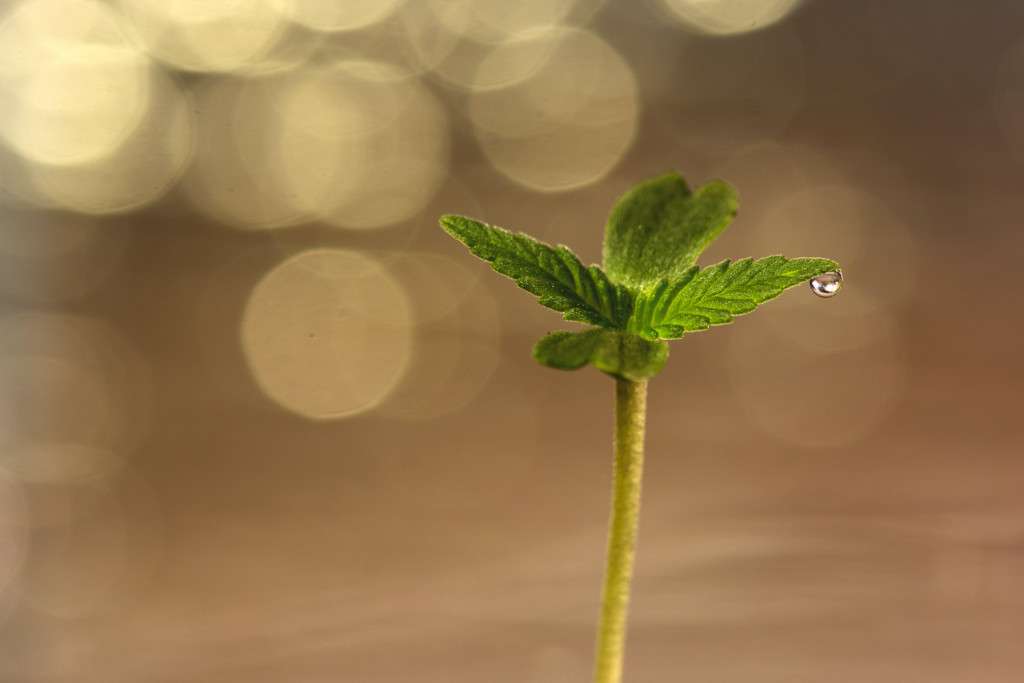
The seedling stage will move on to the vegetative state, which is marked by the emergence of leaves. Each set of leaves tells you it is a new phase of growth. The cotyledon leaves are the first leaves that will appear, followed by single-finger leaves. Finally, you will see the last set, a more complex group of leaves with jagged edges.
At this point, you can provide blue light to the plant using fluorescent bulbs, which provide great benefits for the young seedlings. Over time, you need to change the range of light wavelengths to support healthy growth.
As soon as the seeds enter the seedling stage after germination, the focus is now on ensuring there is a robust root system. Remember that cannabis seedlings thrive in environments with controlled moisture and light. Keep the potting soil balanced, as well, as it ensures the correct moisture level for your plant. However, do not mistake moisture for water. The last thing you want to do is to over-water, which is one of the most common blunders that first-time growers do. Instead, you should aim to maintain a suitable water level without drowning the plant. This will not only keep cannabis healthy but also avoid root problems.
Aside from over-watering, another common mistake is over-fertilizing the plant. You should not add extra nutrients to the seedlings, as they can be vulnerable to excessive amounts of minerals. If you created a humidity dome or used plastic covers, remove them once in the seedling stage. Air is crucial for your crops, so allow it to flow freely. Additionally, it causes humidity to build up around the plant, which is damaging to it.
Should You Use Clones?
If you want to save time and money, you will hear some growers tell you to use clones. These clones, as the name suggests, are genetically identical cannabis plants that came from healthy parts of cannabis. Unfortunately, this process does not involve germinating your cannabis seeds. In fact, it allows you to skip that stage altogether since you already have a plant that will take root quickly.
Clones offer stable genetics, as they are as robust as the mother plant. Unlike weed seeds, you automatically have a female plant. The problem, however, is that clones are delicate. You need to be careful when transplanting them. Additionally, if there are any genetic faults from the mother, the clone will also carry them.
That being said, I think clones solve more problems then they create, and are a very viable way to go.
Conclusion
Germinating cannabis seeds tends to be the nemesis for many new growers. Therefore there is much written about that subject. Here are some additional articles for you to read…..
Cannabis Seed Germination Test 2024
Causes of Low Germination Rates for Cannabis Seeds
How Long to Soak Cannabis Seeds
How To Sprout Cannabis Seeds Using The Soaking Method
How To Germinate Cannabis Seeds
Benefits of Hydrogen Peroxide for Cannabis Plants
• Who is the Ghost? (My Reveal)
• Cannabis Growing Guide 2025-2026
• Real Customer Testimonials & Reviews
• Real Customer Harvest Photos
This article is provided for educational and informational purposes only. It is not intended as cultivation or grow advice, nor does it encourage any illegal activity. All cannabis seeds sold on JustCannabisSeed.com are novelty items, souvenirs, and collectibles only. Germination and cultivation of cannabis seeds may be illegal in your jurisdiction—you are solely responsible for complying with all local, state, and federal laws. We do not condone breaking any laws. For full details, please read our Disclaimer, Terms & Conditions, and Privacy Policy.


Very excited for the landrace genetics http://www.Justcannabisseed.com has to offer. I bought the Lebanese strain from this website and looking forward to propagating them shortly. Legit website so go ahead and place an order for yourself.
I am on a journey figuring out what a landrace can offer Vs a commercial cross and I was able to find what I was looking for, for a long time now. Huge thank you to http://www.Justcannabisseed.com for preserving and sharing with the world.
What’s been crossed over the years in my understanding is no match to pure original uncrossed genetics.
Just buy and try.